

Planning a wedding feels enormous at first, a long list of decisions, deadlines, and people to coordinate. But every well-run wedding is just a sequence of the right calls made in the right order. This guide gives you that sequence as 50 numbered steps, grouped by how far out you are, from twelve months before to the thank you cards you post after.
Alongside the steps you will find the two things most planning guides leave out: a table of what each vendor typically charges to hold your date and when the balance falls due, and a calculator that turns your wedding date and guest count into the exact quantity of every stationery piece and the date each one has to be ordered by. If you want the granular task list instead, our companion wedding planning checklist covers the to-dos. This hub is about sequence, timing, and the judgment calls that connect everything.
- Start planning 12 months out for the most venue and vendor choice; 6 months is workable with a tighter shortlist.
- Lock decisions in this order: date, venue, guest count, budget, photographer and caterer, remaining vendors, stationery, details.
- 50 steps below, grouped into ten phases from 12 months out to after the wedding.
- Send save the dates 6 to 8 months before the wedding; invitations 6 to 8 weeks before.
- Stationery lead time is 2 to 4 weeks for digital and up to 8 weeks for foil or letterpress. Build that in before you think you need to.
- Work out how many of each piece to order, and the date each one has to be ordered by, with the stationery calculator below.
- Vendor booking windows, deposits and balance dates are in one table further down.
- Less than 6 months to go? Skip to the condensed timeline.
The decision order that prevents expensive backtracking
The single biggest planning mistake is making decisions out of order. Booking a caterer before you know your guest count, ordering stationery before your venue is confirmed, or setting a budget after you have already committed to vendors, each of those creates rework that costs real money.
Four decisions carry the rest of the plan, and they only work in one direction:
- Date range. A season or a two to three month window, not a fixed date. This is the only decision you make with no external constraint, and everything else narrows from it.
- Venue. Your venue sets your exact date, your guest ceiling, your permitted caterers, and most of your aesthetic. It is the highest-stakes booking you will make.
- Guest count. The venue sets the ceiling. Your list sets the number you actually plan against, and that number multiplies through catering, stationery, favors, seating, and transport.
- Budget. Only after the first three can a budget be real rather than aspirational, because venue cost and per-head catering are the two largest lines and both are now known.
Reverse any pair of those and you pay for it. A budget set before the guest list is a guess. A caterer booked before the count is a renegotiation. Stationery ordered before the venue contract is signed is a reprint. Everything from step 8 onward can move around to suit you. The first four cannot.
Vendor booking windows, deposits, and when the balance falls due
Two questions decide whether your plan is realistic: how far ahead each vendor books out, and how much cash each one wants up front. Most planning guides answer the first and skip the second, which is why couples with a workable budget still run into a cash-flow problem in the last month, when four or five balances land at once.
The table below is the pattern across the US market. Windows stretch by three to six months for a peak-season Saturday in a major metro, and compress for a Friday, a Sunday, or an off-peak date.
| Vendor | Book it | To hold the date | Balance due | What the cancellation clause usually says |
|---|---|---|---|---|
| Venue | 12 to 18 months, up to 24 for a peak-season Saturday | 25 to 50% | 30 to 90 days before | Deposit is non-refundable, then a sliding scale, often the full amount inside 30 days |
| Photographer | 12 to 18 months | 25 to 50% retainer | 7 to 30 days before, sometimes on the day | Retainer is non-refundable; one date transfer is often allowed |
| Videographer | 12 to 18 months | 25 to 50% retainer | 7 to 30 days before | Same shape as the photographer, and often the same studio |
| Caterer | 6 to 12 months, earlier if the venue mandates an in-house team | 10 to 25% | 7 to 14 days before, once the final count is in | The head count you give locks 7 to 14 days out and is charged whether or not those guests turn up |
| Live band | 9 to 15 months | 25 to 50% | 14 to 30 days before | Deposit is non-refundable, and a substitute-musician clause is standard |
| DJ | 6 to 12 months | 25 to 50%, or a flat $500 to $1,500 | 14 to 30 days before, sometimes on the day | Deposit is non-refundable; check who supplies backup equipment |
| Florist | 6 to 9 months, 4 to 6 off-peak | 20 to 30% | 14 to 30 days before | Refunds usually stop around 14 days out, which is when your stock is ordered |
| Officiant or celebrant | 4 to 9 months | A flat fee, or a 50% retainer | 30 days before, or on the day | Retainer is non-refundable; travel outside a set radius is billed separately |
| Cake | 4 to 8 months, with the tasting around 6 | 25 to 50% | 14 to 30 days before | Design changes close 2 to 4 weeks out, once the structure is costed |
| Hair and makeup | 4 to 8 months, 6 to 12 for in-demand artists in major cities | 25 to 50%, or a flat booking fee | On the day, or 7 days before | Per-person minimums apply, and adding or dropping people late is where the cost moves |
| Transportation | 3 to 6 months | 25 to 50% | 7 to 30 days before | Overtime is billed by the hour and is the most common surprise line |
| Stationery | Order 2 weeks before your mail date for digital, 3 for flat foil, 6 for letterpress or foil stamp | Nothing held back, paid at checkout | At checkout | Nothing prints until you approve a designer proof, and two rounds of edits are included |
Three things worth reading off that table before you book anything.
The retainer is the real commitment, not the contract. Almost every line above is non-refundable from the moment it is paid. If you are not certain about a date, you are not ready to pay a retainer, however good the vendor is.
The last month is where the money leaves. Venue, caterer, band, florist, and transport balances cluster in the final 14 to 30 days, on top of the final head count charge. Map those dates into a calendar the week you sign each contract, not the month they fall due. Our wedding budget breakdown has the category-by-category split, and how much to tip wedding vendors covers the amounts that are not in any contract.
Only the contract binds you. The ranges above are what the market does; the terms that apply to you are the ones you sign. Before you sign anything, read what to check in a wedding vendor contract, and take the relevant question list to each meeting: photographer, caterer, florist, DJ, and planner.

12 months or more out: lock the foundation (steps 1 to 7)
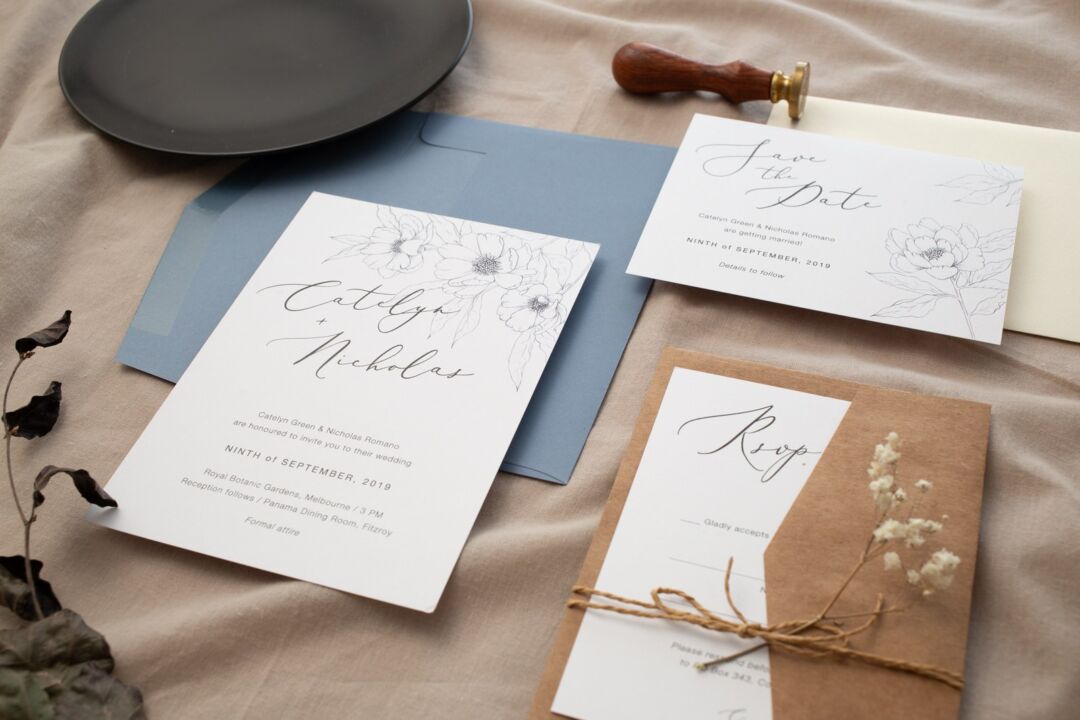
This phase is short on tasks and long on consequence. Seven decisions here set the constraints for the other 43 steps, and each one is expensive to undo. Do not rush past them to the fun parts.
Step 1: Agree on the kind of wedding you are having
Before any vendor, agree with each other on scale and feel. Twenty people over a long lunch and 180 people with a band are not the same wedding at different budgets, they are different projects. Write down three words you both want guests to say afterward. Every later decision gets measured against them, and disagreements surface now rather than at the tasting.
Step 2: Set a date range, not a date
Pick a season or a two to three month window. Saturdays in peak season, roughly May through October, book out 12 to 18 months ahead and sometimes further. Flexibility on the day of the week or the month is the single cheapest upgrade in wedding planning: the same venue on a Friday or in March often costs meaningfully less and is available far sooner.
Step 3: Draft the guest list before you look at a single venue
Write three lists: must-invite, would-like-to-invite, and if-there-is-room. The line between the first two is your working number, and it determines which venues are even worth touring. Doing this after a venue tour is how couples fall for a room that seats 90 when the real list is 140.
Step 4: Work out who is paying, and for what
Have the money conversation before you have the venue conversation. If parents are contributing, establish the amount and whether it comes with expectations about the guest list, because it usually does. A contribution attached to twenty extra names is not the number it looks like once you multiply it by the per-head catering rate.
Step 5: Tour and book your venue
Your venue determines your exact date, your guest capacity, your permitted caterers, your noise curfew, and most of your aesthetic. Tour at the same time of day and season as your wedding if you can, and ask what is genuinely included versus what appears later as a line item. Our guide to choosing a wedding venue covers the questions that matter before signing.
Step 6: Build the budget from the venue and the guest count
Now the two largest numbers are known, so a budget becomes arithmetic rather than optimism. Per-head catering, typically $75 to $200 and up depending on market and format, multiplied by a real guest count, plus a signed venue fee, is usually half the total before anything else is booked. Use our average wedding cost guide for benchmarks and how to save money on a wedding for the cuts guests never notice.
Step 7: Decide whether you are hiring a planner
Decide now, because a full-service planner is most useful when hired before the vendor bookings they would otherwise be inheriting. A day-of coordinator can be hired much later. If you are handling it yourselves, accept that the job is real: expect 200 to 300 hours across the engagement, and see what a wedding planner costs before ruling it out.
9 to 12 months out: book what sells out first (steps 8 to 13)
Every vendor in this phase sells a fixed number of Saturdays a year. Once a date is gone it is gone, and no budget increase brings it back. This is the phase where speed genuinely matters more than deliberation.
Step 8: Book your photographer
The photographer is the vendor whose work you keep for the rest of your life, and the one with the least elastic supply. Book 12 to 18 months out, longer for a well-known name in a major city. Review a full gallery from a single wedding, not a highlight reel assembled from fifty, and confirm who is actually shooting your day. Take a shot list to the meeting.
Step 9: Book your videographer
Decide whether you want film at all before you shop for it, because it is one of the easiest lines to cut and one of the most regretted. If you want both, booking the pair from the same studio usually costs less and removes a coordination problem on the day. Our photographer versus videographer comparison covers what each actually delivers.
Step 10: Book the band or DJ
Live bands book 9 to 15 months out and DJs 6 to 12. Ask about the setup and pack-down time your venue has to allow for, the power and space they need, and what happens if a member falls ill. If you are still deciding, our band versus DJ comparison covers cost, space, and how each one actually handles a dance floor.
Step 11: Lock the caterer, or the venue’s in-house terms
If your venue has a preferred or mandated list, this is a shorter conversation than you expect, and the real work is understanding the package: what the per-head rate includes, what staffing costs on top, and what the minimum spend is. If catering is open, book 6 to 12 months out and get the tasting scheduled.
Step 12: Book the officiant or celebrant
The person who legally marries you is easy to leave late and awkward to fix. Popular officiants book 4 to 9 months out, and in some jurisdictions the paperwork has to be lodged with a minimum notice period, so meeting early has a legal reason as well as a practical one. If you are marrying in Australia, our celebrant guide covers the notice requirements in full.
Step 13: Choose your wedding party
Ask people now, while there is still time for them to plan travel, budget for outfits, and organize a pre-wedding event. Be explicit about what you are asking for financially. The most common source of wedding party friction is not the request itself, it is an unstated cost that arrives four months later.
6 to 9 months out: save the dates and the guest list (steps 14 to 19)
This is where the abstract plan becomes something your guests can see. It is also the phase couples most often underestimate, because collecting addresses for 120 households takes far longer than choosing the card they go on.
Step 14: Close the guest list
Move names off the if-there-is-room list and commit to a number. Every downstream quantity, catering, seating, place cards, favors, and transport, is calculated from it. Reopening the list after save the dates have gone out is possible, but it means a second, visibly different mailing.
Step 15: Collect every mailing address in one place
One spreadsheet, one row per household, with the full postal address and a column for how each household RSVPs. This unglamorous step is the one that stalls stationery more than any other, and it is the only part of the process nobody else can do for you. Start it before you choose a design.
Step 16: Order your save the dates
Work back from your send date, not forward from today. Digital, white ink, and metallic print run 3 to 5 business days after proof approval; flat foil runs 7 to 10; letterpress and foil stamp run 20 to 23. Add 1 to 2 business days for your designer proof and 2 to 4 business days of DHL Express transit. The calculator below turns your wedding date into the exact order-by date.
Step 17: Send your save the dates
Six to eight months before the wedding for local guests, and 9 to 12 months for a destination wedding or a holiday weekend, where guests need to book flights and request leave. One per household, not per guest. Anyone who receives a save the date must receive an invitation, so this is the point at which your list becomes a commitment. Browse save the date designs.
Step 18: Book accommodation blocks and set up your wedding website
Reserve room blocks at two price points near the venue and get the links live, because the save the date is what sends guests looking for them. A simple wedding website carries travel details, dress code, and the registry, which keeps the invitation itself uncluttered and gives you somewhere to put information that changes.
Step 19: Start dress and suit shopping
Wedding dresses commonly take 6 to 9 months to order and arrive, before alterations, which take another 2 to 3 months and usually run across two or three fittings. Suits are faster but not instant if anything is made to measure. Starting here is not early, it is on time.

4 to 6 months out: the details take shape (steps 20 to 26)
The foundation is set and the big money is committed. This phase is about the vendors who make the day look and feel the way you described it in step 1, and about getting your invitation suite designed before the print run has to start.
Step 20: Book the florist
Florists book 6 to 9 months out for peak season and 4 to 6 off-peak. Bring photographs of your venue, not just of flowers you like: the same arrangement reads completely differently in a barn and in a ballroom. Ask what is in season on your date, because an out-of-season flower is the fastest way to double a floral quote.
Step 21: Book hair and makeup, and schedule the trial
Book the artist and the trial in the same conversation, and hold the trial on a day you are being photographed if you can. Confirm the per-person rate, the minimum booking, and the earliest start time, because a large wedding party on a morning ceremony is the scenario that needs a second artist. Our guide to what to expect at a hair and makeup trial covers how to brief it.
Step 22: Order the cake, and book the tasting
Bakers book 4 to 8 months out, with tastings around the 6 month mark. Decide the serving count before the design, since tiers are priced by servings rather than by height, and confirm whether your venue charges a cutting fee. Our cake serving guide sizes it against your guest count and what to expect at a tasting covers the appointment itself.
Step 23: Book transportation
Three to six months is enough for most markets. Work out the movements first, then book to them: getting-ready location to ceremony, ceremony to photographs, photographs to reception, and the last run home. Overtime is billed by the hour and is the most common transport surprise, so build a buffer into the booked window rather than hoping.
Step 24: Choose your ceremony readings and music
The ceremony is the reason everyone travelled, and it is consistently the part that gets the least planning attention. Choose readings, ask your readers now so they have time to practice, and decide on processional and recessional music. Our ceremony script guide gives you a structure to work from.
Step 25: Register for gifts, or set up your wishing well
Do this before invitations are designed, because the registry or wishing well wording goes on a details card, not on the invitation itself. Give a spread of price points, and if you would prefer contributions to a honeymoon or a home, say so plainly. Guests overwhelmingly prefer a clear instruction to a polite ambiguity.
Step 26: Choose and order your invitation suite
Order the whole suite at once, invitation, RSVP card, details card, and any belly band or envelope liner, so colors, stock, and typography match across every piece. If you want foil, letterpress, or embossing, this is the deadline that matters: those methods run 20 to 23 business days in production, so the design conversation has to start 8 to 10 weeks before your send date. Browse wedding invitation designs.
2 to 3 months out: invitations go out (steps 27 to 32)
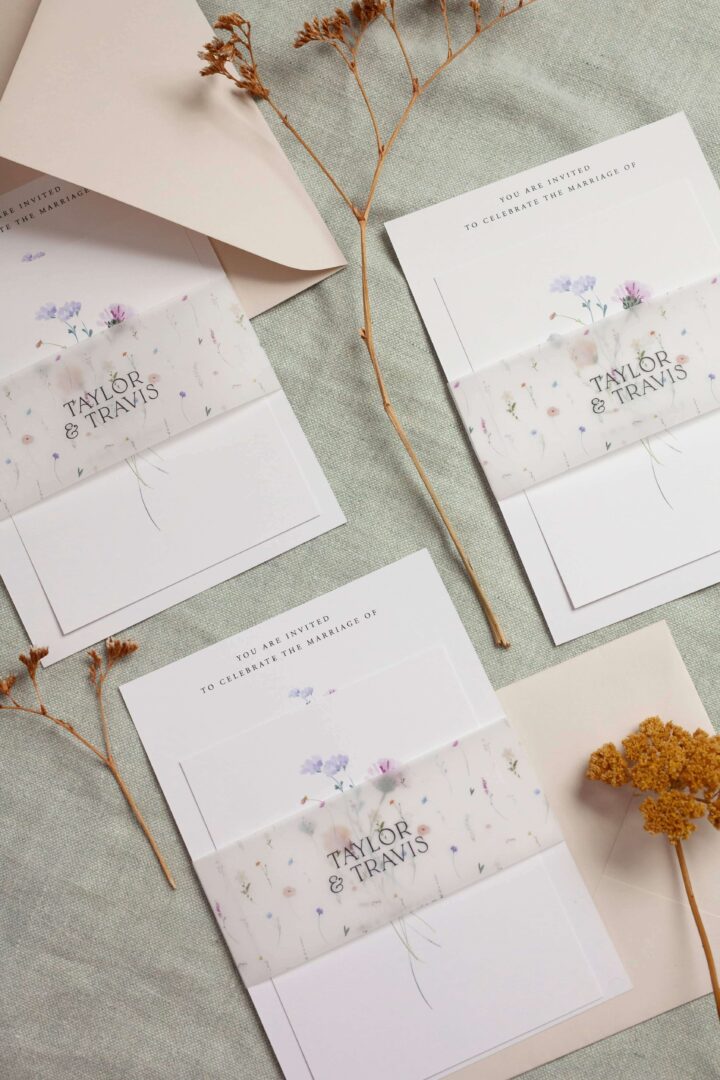
Everything in this phase runs off one date: the day your invitations land. Set it first, then work backward for the proof and print, and forward for the RSVP deadline and the final head count.
Step 27: Approve the proof and send your invitations
Six to eight weeks before the wedding for local guests, and 3 to 4 months for a destination wedding. That window gives guests time to arrange travel and gives you time to chase replies before the caterer needs a number. Proof carefully: check the date against a calendar, the venue address against a map, and every name against how that person actually spells it.
Step 28: Apply for your marriage license
Requirements are set by the jurisdiction where the ceremony takes place, not where you live, and they vary more than most couples expect. Some places issue same day, others impose a waiting period, and most licenses expire between 30 and 90 days after issue, so applying too early is a real mistake. Confirm the window, the ID required, and whether witnesses must be named in advance.
Step 29: Finalize the ceremony order of service
Lock the running order with your officiant: processional, readings, vows, ring exchange, signing, recessional. Once it is fixed you can have the order of service printed, brief your musicians against real cue points, and give your photographer a schedule they can position for.
Step 30: Confirm the menu and the drinks package
Sign off the final menu, and get every dietary requirement in writing rather than in conversation. Confirm what the drinks package covers, when it starts and stops, and what happens if it is exhausted mid-reception, because that is a decision far better made now than by a venue manager at 10pm.
Step 31: Buy the rings and plan the rehearsal dinner
Allow 4 to 8 weeks for ring sizing and engraving. Book the rehearsal dinner venue and send its invitations at the same time as the wedding invitations, so out-of-town guests can plan a single trip. Our guide to rehearsal dinner costs covers what a sensible budget looks like.
Step 32: Write your vows
If you are writing your own, start now, not in the last week. Agree on a rough length and a tone with each other first, so one of you does not arrive with two minutes and the other with eight. Read them out loud, once, to nobody. Everything that does not survive being said aloud comes out.
1 month out: the numbers close (steps 33 to 38)
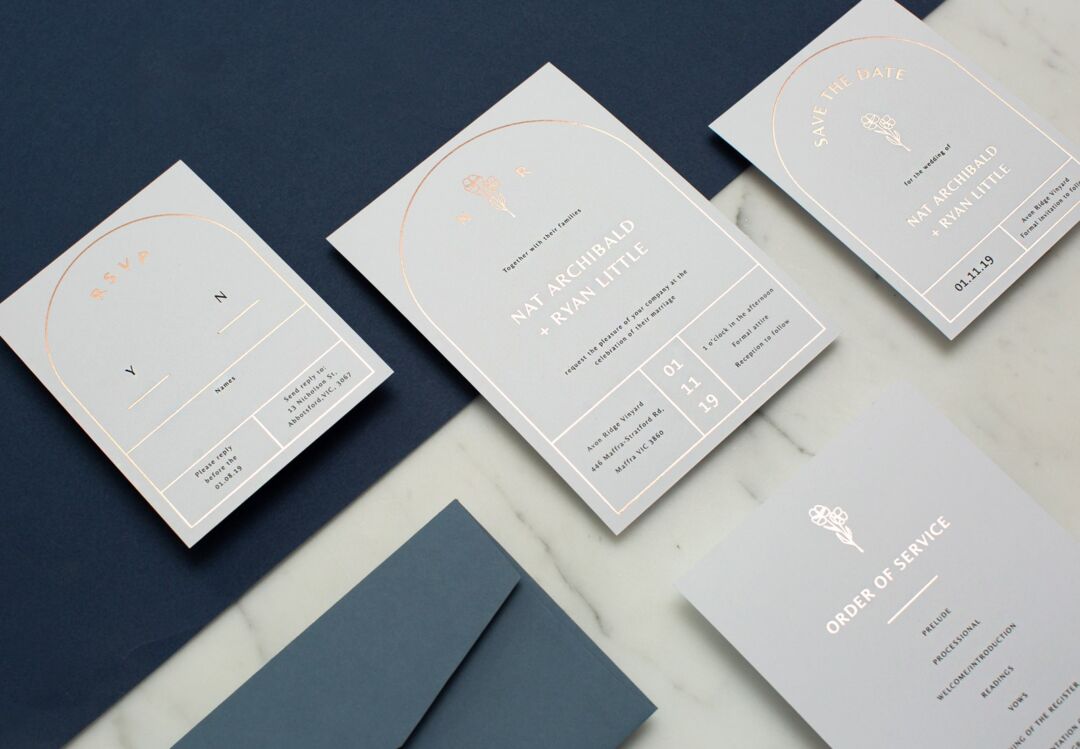
This phase converts replies into final quantities. Nothing here can be started early and nothing can be left late, because every number depends on the RSVP deadline landing first.
Step 33: Chase the RSVPs that have not come back
Expect to chase 20 to 30 percent of your list, and expect a phone call or a text to work where a second email does not. Do it in the week before your stated deadline, not after it. Our guide to RSVP card wording covers how the reply-by date should have been framed in the first place.
Step 34: Close the RSVP deadline and build the final list
Set the deadline 3 to 4 weeks before the wedding, which gives you a week to chase, a week to seat, and a week before the caterer’s own cutoff. Anyone who has not replied by then is a no, unless you decide otherwise, and that decision should be made once rather than guest by guest.
Step 35: Build the seating plan
Start from the tables, not the people: fix the table count and the seats per table, then fill them. Place the hardest groups first while you still have flexibility everywhere else. Our wedding seating chart guide covers escort cards versus place cards and when you need both.
Step 36: Order place cards, the seating chart, and signage
These are the last stationery pieces to order, and they are the only ones that need final names, which is why they wait for the RSVP deadline. Menus, order of service, and table numbers do not need names and can be ordered several weeks earlier, alongside the invitations. Signage on acrylic runs 10 to 15 business days, so it is the one day-of piece that cannot be left to the final fortnight.
Step 37: Give the caterer your final head count
This is a contractual number, not an estimate. Most contracts lock it 7 to 14 days out and charge for it whether or not those guests attend, so count carefully, include vendors who are contracted to be fed, and confirm in writing.
Step 38: Final dress and suit fittings
Schedule the last fitting 2 to 3 weeks out, close enough that your measurements will hold and far enough that a problem is still fixable. Bring the exact shoes and underwear you will wear on the day. Take the garment home in a bag it can hang in, and hang it somewhere it will not be touched.
The final two weeks: the handover (steps 39 to 42)
Your job in the last fortnight changes from making decisions to transferring information. Everything you know has to end up with the people who will be running the day while you are getting married.
Step 39: Send the day-of timeline to every vendor
One document, one version, sent to everyone: arrival and setup windows, ceremony start, photograph locations, speeches, first dance, and the pack-down time your venue enforces. Include a phone number that is not yours. Our wedding day timeline guide has a structure you can adapt.
Step 40: Confirm delivery and setup windows
Reconfirm each vendor’s access time against what the venue actually allows, because these are the two schedules most likely to disagree. Florists, cake, and rentals often need the same doorway at the same hour, and it is much easier to sequence that now than on the morning.
Step 41: Pay the outstanding balances
Most balances fall due in this window. Pay them, keep the receipts in one place, and prepare tip envelopes now, labelled, so that handing them over on the day is somebody else’s five-minute job rather than your problem at midnight.
Step 42: Assemble the day-of stationery and hand it over
Sort place cards into table order, count the menus against the seating plan, and pack everything in labelled boxes with a one-page setup sheet on top. Give the boxes to your coordinator or the person running setup. Your stationery working on the day is a packing job, not a design job.
The week of the wedding (steps 43 to 45)
Three steps, and none of them is a decision. If something genuinely cannot be resolved this week, it was going to be a problem regardless, and the honest move is to let it go rather than to spend the week on it.
Step 43: Pack and delegate
Pack for the wedding night and the honeymoon early. Write down who is holding the rings, who is paying the celebrant, who is taking the gifts home, and who is returning hired items. Every one of those has a name against it before the rehearsal, in writing, where somebody other than you can read it.
Step 44: Rehearse
Walk the ceremony with everyone who has a part in it, in the actual space if you can get access. Rehearsals are not about performance, they are about making sure nobody has to guess where to stand. Ten minutes here removes the most visible category of wedding-day awkwardness.
Step 45: Rest
Eat properly, sleep, and get outside. Nothing you can add in the last 48 hours will improve the day as much as arriving at it rested. Hand your phone to somebody else for the last few hours before the ceremony.
The wedding day (steps 46 and 47)
Step 46: Hand the day over
Your coordinator, planner, or the friend who volunteered now runs the timeline. Give them the vendor contact list and the setup sheet, and then stop being the escalation point. If something goes wrong, you are the last person who should hear about it.
Step 47: Be present
Eat something. Take fifteen minutes alone together at some point, deliberately, because almost every couple says afterward that the day moved faster than they expected. The guests came for the two of you, not for the details you are still noticing.
After the wedding (steps 48 to 50)
Step 48: Return, settle, and review
Return the hired items inside the contracted window, settle any final invoices, and write the reviews while the day is fresh. Your vendors run on those reviews, and the ones who did well for you have earned them.
Step 49: Send your thank you cards
Aim to post within three months of the wedding. Order them with the rest of your suite so the design carries through, keep a list of who gave what as gifts arrive rather than reconstructing it later, and write a specific sentence in each one. Browse thank you card designs.
Step 50: Handle the paperwork
Collect your marriage certificate, which is a separate document from the license and often arrives weeks later. If either of you is changing a name, the certificate is what every other organization will ask for, and the order to work through is identity documents first, then financial, then everything else.
Where stationery fits, and how many of each piece to order
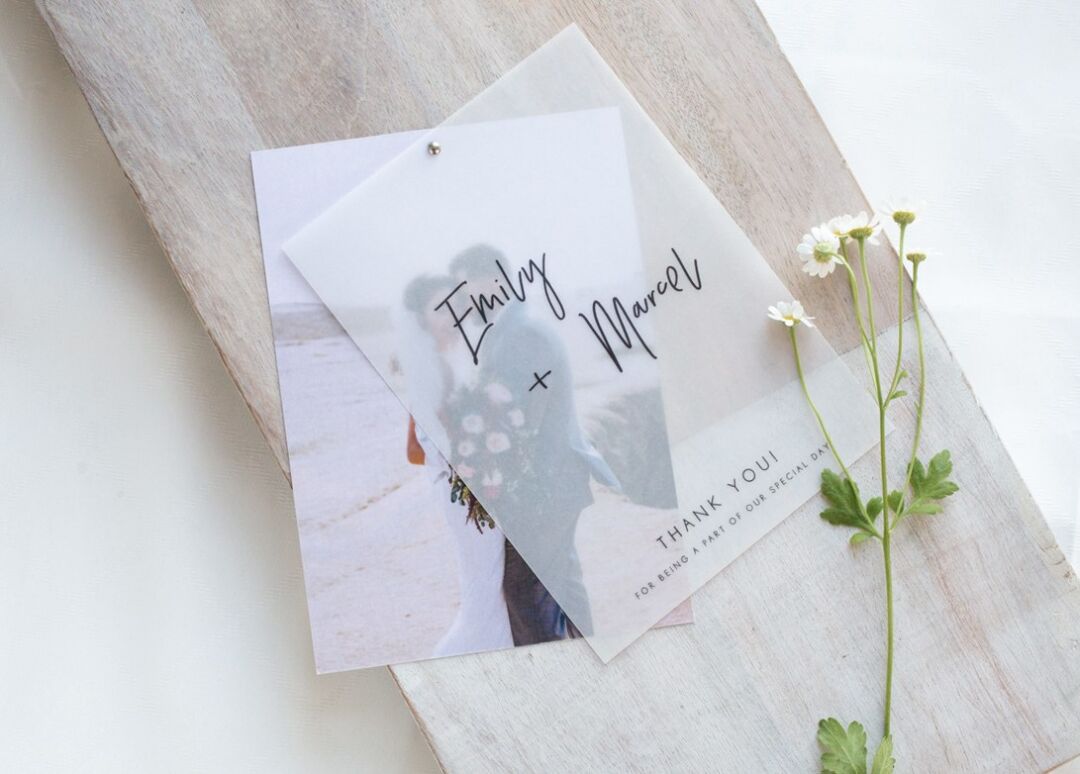
Stationery is one of the few planning categories where lead time directly limits your options. Rush digital printing is possible, but foil and letterpress require design proofs, paper sourcing, and extended production runs, and no amount of budget shortens a 20 business day press schedule.
Stationery quantity and send-date calculator
Two numbers you already know turn into how many of each piece to order, and the date each one has to be ordered by. Nothing is saved and nothing is sent.
Your dates
Order-by dates already include the print run and a week to proof, address and post. A date in red has passed.
| Milestone | Date |
|---|---|
| Order save the dates | |
| Send save the dates | |
| Order invitations | |
| Send invitations | |
| Order menus, order of service, table numbers | |
| RSVP deadline | |
| Order place cards and seating chart | |
| Post thank you cards by |
What to order, by post
One per household, plus 10 percent for addressing mistakes, late additions and a copy for the album, rounded up to the 10-card step.
| Piece | Order |
|---|---|
| Save the datesOne per household, not per guest. | 1 |
| InvitationsFree white envelopes are matched to the card count, so a spare card is a spare envelope. | 1 |
| RSVP cardsSkip these if you are collecting replies on a wedding website. | 1 |
| Details cardsAccommodation, travel, dress code, anything that would clutter the invitation. | 1 |
| Thank you cardsOne per gift, which tracks households, plus a few for vendors. | 1 |
What to order, for the day
Per guest, plus 5 percent. These are ordered last, once RSVPs have closed and you have the final names.
| Piece | Order |
|---|---|
| MenusOne per guest. One per two covers only if the table is sharing. | 1 |
| Place cardsOne per seated guest, printed once RSVPs have closed. | 1 |
| Order of serviceRoughly 8 per 10 guests, since couples share one. | 1 |
| Table numbersOne per table, worked out from your seats-per-table. | 1 |
One of each
| Piece | Order |
|---|---|
| Seating chartOne large sign at the entrance can replace place cards entirely. | 1 |
| Welcome signWelcome, bar, and directional signs are usually ordered as a set. | 1 |
| Guest bookOne, and it is the only piece your guests take turns holding. | 1 |
Save the dates: 6 to 8 months before
Save the dates lock your guests’ calendars before they book conflicting travel. They do not need to match your full invitation suite, but ordering them together with your invitations gives you visual consistency and saves design time.
Paperlust delivers design proofs within 1 to 2 business days. Digital print, white ink, and metallic production runs 3 to 5 business days; flat foil runs 7 to 10 business days; letterpress and foil stamp run 20 to 23 business days. Add 2 to 4 business days for DHL Express delivery to most US addresses, free on orders over $350 USD.
Browse: Save the date designs
Invitations: 6 to 8 weeks before the wedding
This is the rule most couples underestimate. Six to eight weeks gives guests time to book travel and respond, and gives you time to deliver a final head count to your caterer. For foil or letterpress invitations, begin your design process 5 to 8 weeks earlier still to allow for proofs and production.
Browse: Wedding invitation designs
Day-of stationery
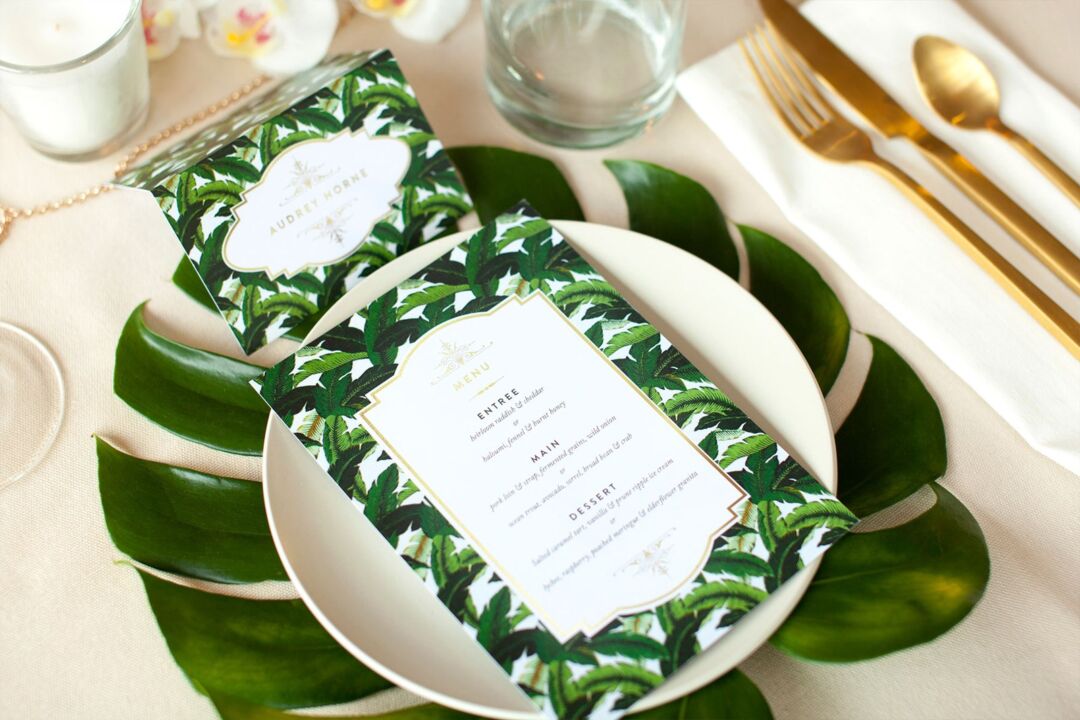
Menus, order of service, and table numbers can be ordered 4 to 6 weeks out for digital print, because none of them needs final names. Place cards and the seating chart wait for the RSVP deadline. If you want a fully coordinated wedding stationery suite, ordering everything from the same designer keeps color consistent across every piece.
Wedding planner vs. DIY: what each option actually costs
A full-service wedding planner ($2,000 to $10,000 and up) handles venue sourcing, vendor negotiation, timeline creation, and day-of coordination. The value is not just time savings, it is access to preferred vendor networks and someone whose job it is to absorb stress on your behalf.
A day-of coordinator ($500 to $2,500) takes over logistics in the final 4 to 6 weeks and runs the day itself. You do the planning; they execute it. This is often the highest-ROI hire for couples who want independence without managing vendors on the day.
Planning it yourself is entirely viable for smaller weddings or couples with strong organizational skills. Expect 200 to 300 hours from start to finish. If you go DIY, our wedding planning checklist gives you the task-level breakdown for each phase, and what a wedding planner costs sets the comparison.
If you have less than 6 months
A compressed engagement changes your strategy, not your sequence. The decision order still holds, venue before vendors, guest count before budget. You are just running each phase in weeks instead of months.
Priorities on a short timeline: book your venue immediately and accept that first-choice dates may be gone, book your photographer within two weeks, and go digital print for stationery, since foil and letterpress may not be feasible under time pressure. Be honest about scope. A three month wedding can be beautiful, but probably not a 200-person event with custom foil invitations and a live band.
| Month | Priority actions |
|---|---|
| Month 6 | Book venue and date; book photographer; draft guest list and budget |
| Month 5 | Send save the dates; book remaining vendors; begin dress and suit shopping |
| Month 4 | Finalize catering, florist, officiant; order invitations |
| Month 3 | Send invitations; book hair and makeup; apply for marriage license |
| Month 2 | Collect RSVPs; finalize seating; book transportation; order day-of stationery |
| Month 1 | Confirm all vendors; final fittings; rehearsal; deliver final head count |
The planning ecosystem: what connects to what
A well-planned wedding coordinates several parallel tracks. Here is a quick orientation to the main areas and where to go for more detail.
Ceremony
Venue, officiant, vows, and decor. See our guides to ceremony decoration ideas, wedding arch ideas, aisle decoration ideas, and ceremony script writing. Working with a civil celebrant? Our celebrant guide covers the full process.
Photography
Your photographer is the only vendor whose work you will have for the rest of your life. Our wedding photo ideas, photoshoot poses, and pre-wedding photoshoot guide help you brief your photographer and capture the moments that matter.
Food and drink
See wedding food ideas for format choices and canape ideas for the pre-dinner drinks phase. Our wedding themes for 2026 guide ties food, decor, and stationery into a cohesive aesthetic direction.
Ready to start your stationery?
Browse 500+ designs from independent artists
From save the dates to full suites, every design is customizable, proofed by a professional designer within 1-2 business days, and printed in Melbourne.
Five planning mistakes worth avoiding
Setting budget before guest count
Per-head catering costs, $75 to $200 and up per guest depending on your market and style, make guest count the biggest budget multiplier in wedding planning. Draft your guest list before you build your budget, so the numbers reflect reality instead of an optimistic assumption.
Underestimating stationery lead times
Foil stamping and letterpress have 20 business day production runs, plus proof review time and transit. Many couples order with 4 weeks to go and discover their options are now limited to digital print. If you want premium stationery, start the design conversation at least 8 to 10 weeks before your send date.
Skipping the written vendor contract
Every vendor relationship, venue, photographer, caterer, florist, band, should be in a signed contract specifying what is included, the payment schedule, cancellation terms, and a backup plan. Verbal agreements are unenforceable when something goes wrong. Our vendor contract guide covers the clauses that matter.
Neglecting the ceremony in favor of the reception
Most planning energy goes into the reception, but the ceremony is the reason everyone gathered. Spend real time on your vows, your ceremony script, and your music. These are the moments guests remember longest.
Treating every task as equally urgent
Venue and photographer bookings have long lead times and real scarcity. Favor colors and thank-you wording do not. Sequence your energy by what closes earliest, and do not let low-stakes decisions consume the weeks when the high-stakes ones need attention.
Once your date, venue, and guest list are locked, get your save-the-dates and invitations moving. 500+ exclusive designs with foil, letterpress, and digital options. Free designer proof in 1-2 business days, DHL Express on orders over $350 USD.
Frequently asked questions
What are the steps to planning a wedding?
In order: agree on the kind of wedding you want, set a date range, draft the guest list, book the venue, build the budget, then book the vendors with the least availability, photographer, videographer, band, caterer, and officiant. Save the dates go out 6 to 8 months before, invitations 6 to 8 weeks before, and the final head count 7 to 14 days before. The 50 numbered steps above expand each of those into what to do and when.
How far in advance should you start planning a wedding?
Twelve months is the standard for a full-scale wedding, because it gives you the widest choice of venues and vendors, especially for Saturday peak-season dates. Six to nine months is workable for smaller weddings or off-peak dates, and three months is possible if you are flexible on venue and go digital print for stationery.
What is the first thing you should do when planning a wedding?
Set a date range and draft your guest list, then book the venue. Guest count, budget, vendors, and stationery all flow from knowing when and where. Couples who set a budget before choosing a venue usually find the numbers do not match reality.
How long does it take to plan a wedding?
The average engagement runs 12 to 18 months, and most of that time is spent waiting on other people’s calendars rather than working. Expect 200 to 300 hours of actual planning across the engagement if you are doing it yourselves, concentrated in the first two months and the last six weeks.
What order should you book wedding vendors in?
Venue first, always, because it fixes your date and capacity. Then photographer and videographer, then band or DJ, then caterer if the venue does not mandate one, then officiant, florist, cake, hair and makeup, and transport. The rule is simple: book by scarcity, not by how exciting the decision is.
Can you plan a wedding in 6 months?
Yes, and it is a common timeline. You lose some venue and photographer choice, particularly for peak-season Saturdays, and premium print methods become tight. Book the venue and photographer in the first fortnight, send save the dates immediately rather than skipping them, and choose digital or flat foil stationery.
Can you plan a wedding in 3 months?
Yes, with two conditions: be flexible on the date and the day of the week, and keep the guest list small enough that a venue with late availability can hold it. Skip save the dates and send invitations straight away. Stationery is still workable, since digital print runs 3 to 5 business days after proof approval.
How much does a wedding cost?
Venue and catering together typically account for around half the total, which is why guest count moves the number more than any other single choice. Our average wedding cost guide has the benchmarks by category and our wedding budget breakdown shows how the percentages usually fall.
How much deposit do wedding vendors require?
Most vendors take 25 to 50 percent to hold your date, paid at signing and almost always non-refundable. Caterers are usually lower at 10 to 25 percent, florists around 20 to 30. Balances typically fall due 7 to 30 days before the wedding, which means most of them land in the same fortnight. The table above has the pattern vendor by vendor.
When should you send save the dates?
Six to eight months before the wedding. For destination weddings or holiday weekends, 10 to 12 months gives guests enough lead time to book travel and request leave. One per household, and anyone who receives one has to receive an invitation. Browse save the date designs.
When should wedding invitations be sent?
Six to eight weeks before the wedding for domestic guests, and 3 to 4 months for destination weddings. Factor in production: digital print, white ink, and metallic are 3 to 5 business days; flat foil is 7 to 10 business days; foil stamp or letterpress is 20 to 23 business days; plus 2 to 4 business days DHL transit to US addresses, free on orders over $350 USD.
How many wedding invitations do you actually need?
One per household, not per guest, which for most lists is a little over half the guest count. Add about 10 percent for addressing mistakes, late additions, and a copy for your album. The calculator above works it out from your guest count and rounds every quantity to the 10-card ordering step.
Do you need a wedding planner?
No. Many couples plan their own weddings successfully. A day-of coordinator ($500 to $2,500) is often the highest-ROI option, because you do the planning and they manage the execution on the day. Full-service planners make the most sense for large or complex weddings, or for couples with very limited planning time.
What paperwork do you need to get married?
A marriage license from the jurisdiction where the ceremony takes place, not where you live. Requirements vary widely: some places issue same day, others impose a waiting period, and most licenses expire between 30 and 90 days after issue, so applying too early is a genuine mistake. Confirm the ID required and whether witnesses must be named in advance. After the wedding, the marriage certificate is a separate document that usually arrives weeks later.
What is the hardest part of planning a wedding?
Consistently, the guest list, because it is the only decision that is simultaneously emotional, political, and the largest multiplier on your budget. The second hardest is collecting mailing addresses, which sounds trivial and reliably takes couples several weeks. Both are much easier if you do them early, before anything else depends on them.
What is the difference between this guide and the wedding planning checklist?
The wedding planning checklist is a task-level to-do list organized by timeframe, so it tells you what to do. This hub explains the sequencing logic: why the order matters, how decisions depend on each other, and how to adapt when your situation does not fit the standard timeline. Use both together.
About Paperlust
Paperlust is a Melbourne-based stationery studio founded in 2014. We work with 500+ independent artists to offer designs across digital print, flat foil, foil stamp, letterpress, white ink, and metallic printing, all produced in our Melbourne studio and shipped worldwide. Every order includes a professional designer proof within 1-2 business days, two rounds of edits, and a 100% happiness guarantee.
Browse wedding stationery suites or explore individual invitation designs to find your style.