
This is one of the questions we get asked all the time at Paperlust so here is your definitive guide to how to stuff wedding invitations in the right order, or as we like to call it “how to stuff wedding invitations”.
The general rule for putting wedding stationery together is to assemble your invitations in order of sizing. As the invitation will be the largest card, all enclosure cards should be stacked neatly on top. RSVP or reply cards should be placed face up under the flap of the return envelope, do not put it inside the envelope! The envelopes should be addressed (to you and your fiance) and postage should already be applied.
The invitation needs to be placed into the envelope facing up so that the text on the main invitation is legible when removed by the recipient. In olden times it was generally thought that the invitation should be oriented so that a right-hander removing the invitation would be presented with it facing up, however this is no longer a hard rule. In the past it was traditional for tissue paper to be placed around the invitation to protect from ink running. However this is no longer required for most invitations and in particular any Paperlust invitation as we use modern printing techniques that do not cause smudging.
At a Glance: Assembling Wedding Invitations
- Build the stack face-up: main invite at the bottom, RSVP card and details on top, all facing the same direction the recipient will read
- RSVP card sits on top: with stamped self-addressed return envelope tucked behind it, flap down
- Belly bands or ribbons go on last: after stacking and before envelope insertion, never around an already-stuffed envelope
- Outer envelope flap on the right: when held address-side up, so guests open intuitively from left
- Test one full envelope before assembly-line stuffing: weight, fit, and seal behavior all need to be confirmed on a real envelope first
Wedding invitation assembly – Invitations only
Shop Wedding Invitations
Customizable wedding invitation suites with matching RSVP cards, details cards, and envelopes ready to assemble.
Invitations should be inserted into the envelope facing upwards so that invitees should be able to read the invitation immediately upon removal from the envelope. In the past this was thought to mean that a right-hander would be opening the envelope, however this is not a hard and fast rule in modern times.
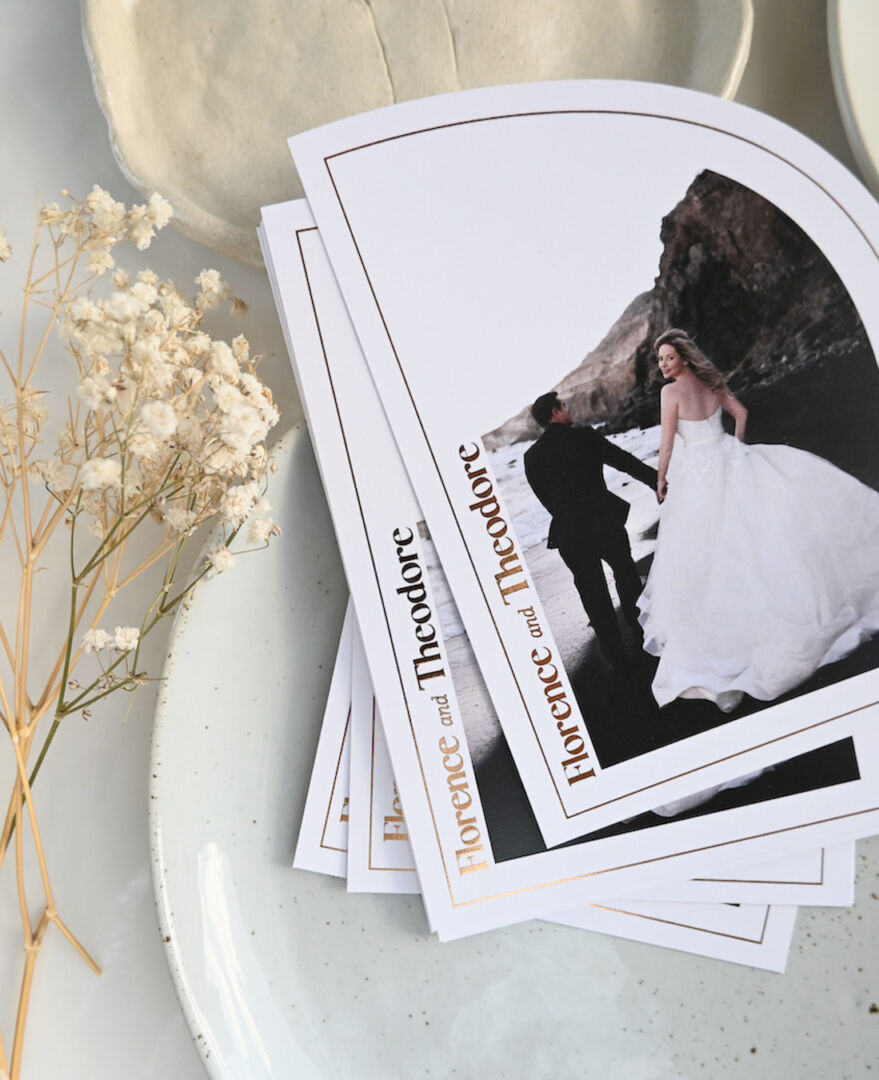

- Slide invitation flat into the inner or outer envelope (depending on whether you use a double-envelope set)
- Front of invitation faces the back of the envelope: when the recipient opens it, the design is the first thing they see
- If using a double envelope: inner envelope flap down, outer envelope flap up
- Single-envelope: seal flap and address on the same side as the back of the invitation
Wedding invitation assembly – How to stuff wedding invitations with an RSVP card
First, insert the invitation facing up (as outlined above). Second, insert the RSVP card or response card, under the flap of the included envelopes (all Paperlust RSVP cards come with free premium envelopes except for those that are postcards), not inside it. RSVP envelopes should be addressed (to you and your fiance) and already include appropriate postage.
- Place RSVP card on top of the main invitation, design-side up
- Tuck a stamped, self-addressed envelope behind the RSVP card: flap-side down
- Slide the stack into the outer envelope face-up, with the invitation as the last layer the recipient sees
- Pre-stamp the return envelope before assembly, adding stamps after stuffing wrinkles the envelope
Wedding invitation assembly – Invitation, RSVP and additional cards (wishing well, recovery/brunch invitations etc)
First, insert the invitation facing up (as outlined above). The largest enclosure card is next (this could be the RSVP card), followed by the rest of the enclosure cards in sizing order from largest to smallest. Insert the RSVP card or response card, under the flap of the included envelopes, not inside it. For more detail on the individual insert cards and their purpose, see our guide to wedding invitation insert cards.

- Order from largest to smallest: main invitation at the bottom, then details card, RSVP card on top
- All cards face the same direction: design-side up
- Reception or wishing-well card sits between the invitation and RSVP card
- Belly band or vellum wrap goes around the entire stack before envelope insertion
- Test one full envelope before assembly-line stuffing, confirm weight, fit, and seal behavior
Wedding invitation assembly – Belly bands
Paperlust belly bands are perfectly designed to match your wedding stationery suite and come in a wide range of designs, paper stocks, and finishes. Our belly bands are narrow 50mm strips of paper that are designed to wrap around your wedding stationery suite and secured using a small piece of invisible tape (not included). Paperlust belly bands can be customized with your names or initials, the wedding date, and even a message of your choosing.
To assemble your suite using a belly band you will first need to stack your wedding invitation suite with the invitation facing up so it is at the bottom of the pile. The largest enclosure card is next (this could be the RSVP card), followed by the rest of the enclosure cards in sizing order from largest to smallest. Insert the RSVP card or response card, under the flap of the included envelopes, not inside it.
Now that your suite is stacked neatly, place your belly band next to them face down on a flat surface. The belly bands are pre-scored so should fold easily so the two back flaps face up into the air. Now carefully flip your stacked invitation suite over and center over the belly band. Once the cards are lying flat on the band and the table you can easily fold the scored flaps over and secure with a piece of invisible tape. Finally slip your wrapped invitation suite into your envelope with the top cards facing up.
Assembly Order by Suite Type
| Suite type | Stack order (bottom to top) | Assembly time per 50 |
|---|---|---|
| Invitation only | Invitation | ~25 minutes |
| Invite + RSVP | Invitation, RSVP card, RSVP envelope | ~45 minutes |
| Full suite | Invitation, details/wishing well, RSVP, RSVP envelope | ~75 minutes |
| Belly band suite | Stack as full suite, then wrap belly band | ~90 minutes |
| Liner + suite | Place liner in envelope first, then full suite | ~105 minutes |
Wedding invitation assembly – Liners
Paperlust also offers a large range of printed and specialty stock envelope liners. These do require a little bit of assembly, but for the impact it will create it is well worth it.
First, insert the Paperlust liner into the envelope until it hits the bottom.
Then, hold the liner down on the inside where the flap folds over (so that it doesn’t move) and then fold the flap down. This is to crease the liner, so use your fingers and run them along the top edge of the envelope to give it a nice firm crease.
Next, open the envelope flap only, leaving the liner folded.
Then, grab the glue stick that we provided and run along the top two edges of the liner, making sure to give it a good coat all the way along.
Finally, fold the envelope flap down to adhere the liner to the envelope. This will be more than enough to hold it in place. Do not fold the liner up to meet with the envelope flap as this could result in an uneven attachment and cause bunching of the liner in the bottom of the envelope.

Wedding invitation assembly – Can Paperlust do it for me?
In order to keep costs down for you we do not offer assembly at this time. All of our stationery is shipped flat to you, however we try to make things easy for you by pre-scoring folded cards and belly bands and including assembly assistance such as glue sticks.
Custom stickers and labels complete your stationery. Browse custom stickers and custom labels at Paperlust Print Shop – from $0.08 each.
Assembling a Modern Wedding Invitation Suite
Modern suites often include more pieces than the classic invitation-only format. Here’s how to handle the most common multi-piece assemblies.
Standard suite (invitation + RSVP + details card): Stack the details card first (face up), then the RSVP envelope (with RSVP card tucked inside face up), then the invitation card on top (face up). The whole stack goes into the outer envelope face up so the text is the first thing seen when the envelope is opened.
Pocket fold suite: The pocket fold does the organizing for you. Slide the invitation into the front of the pocket, then tuck the RSVP card and details card into the pocket behind it, in order of size (largest first). Belly band or ribbon around the outside keeps everything neat before going into the envelope.
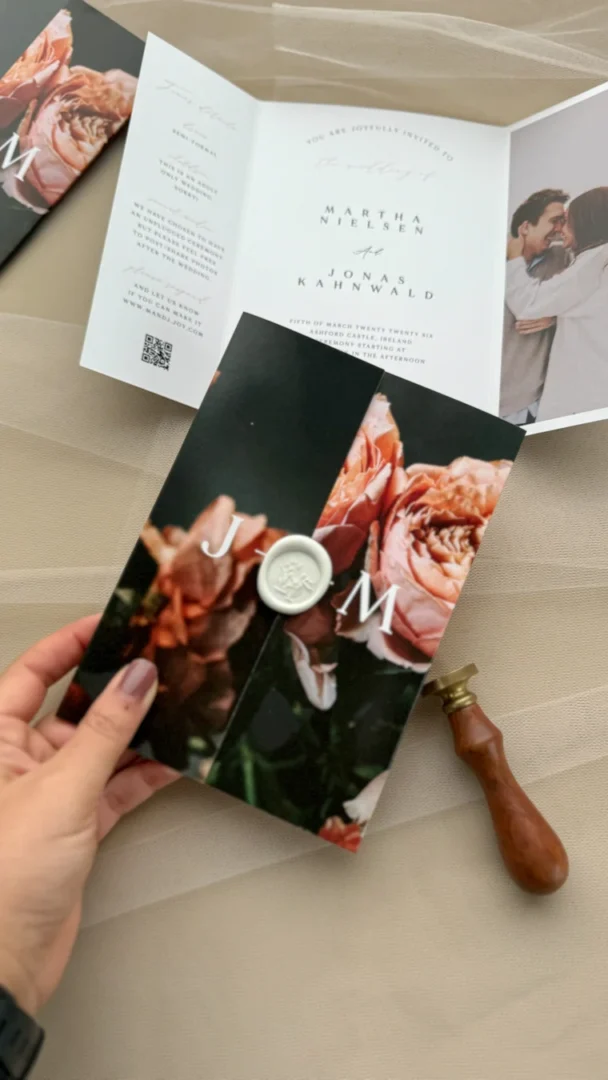
Vellum wrap suite: Wrap the vellum sheet around the invitation card, aligning edges cleanly. Secure with a wax seal on the front or a length of ribbon tied around both. This goes into the envelope as a single wrapped unit – no loose pieces.
Boxed suite: Arrange pieces flat in the box, largest to smallest from bottom to top. The main invitation sits at the base, smaller enclosures on top, with any decorative elements (wax seals, dried botanicals, ribbon) arranged over the top layer. First impressions count – the layout the recipient sees when opening the box is the one that matters. Browse Paperlust’s full wedding invitation suites for assembly-ready options across every format.
How to Address and Seal Wedding Invitation Envelopes
Addressing is where many couples lose hours. Here’s how to do it efficiently and correctly.
Formal addressing: “Mr. and Mrs. James Thompson” for married couples, “Ms. Sarah Chen and Mr. David Park” for unmarried couples sharing an address, “The Thompson Family” if including children. For inner envelopes (if using them), you can be less formal: “James and Emma.”
Who to address to: Address to the people invited only. If children are not invited, address only to the parents. If a guest has a plus one, add “and Guest” after their name. If you know their partner’s name, use it.
Envelope addressing options: Hand addressing (beautiful but time-consuming), printed address labels (practical, professional-looking), or digital calligraphy envelope printing from Paperlust at approximately $0.20 per address. The last option looks like hand-addressing at scale, ideal for guest lists over 50.
Sealing: Moisture-seal the flap with a damp sponge (not your tongue, envelopes can contain irritants). Allow to dry fully before stacking. A wax seal or custom round sticker seal over the flap adds a polished finishing touch and confirms the envelope hasn’t been opened before it reaches your guest.
Shop Wedding Invitation Suites
Order the matching cards, envelopes, and assembly add-ons together so the suite arrives ready to stuff.
Mailing Your Wedding Invitations
Before you seal and stamp 150 envelopes, take one fully assembled invitation suite to the post office and have it weighed. Thick suites with multiple inserts, wax seals, or rigid elements may exceed standard letter rates and require additional postage. Sending one underpaid invitation is far more embarrassing than the cost of a stamp. For a full breakdown of how to calculate postage, timing, and international mailing, see our wedding invitation postage guide.
Request hand-canceling for invitations with wax seals or delicate embellishments, machine sorting can crush or damage them. Most post offices will accommodate this request for a small additional fee or for free if you ask nicely.
How to Choose Your Assembly Approach
Three factors decide whether you assemble at home or outsource: the suite complexity, the volume, and your timeline before mailing.
1. Match assembly to suite complexity
A simple invite-only suite assembles in under 30 seconds per envelope, easy to do at home over an evening. Add belly bands, vellum wraps, wax seals, or liners and you’re at 2-3 minutes per envelope. For high-complexity suites above 80 envelopes, outsourcing pays off in time saved and consistency. Browse wedding invitations with assembly add-ons if you want it done at print.
2. Plan for volume and time
Calculate honestly: a 100-envelope full suite with belly bands takes ~3 hours of focused assembly, plus 1 hour of address application. Most couples underestimate by a factor of two. Build a buffer, start assembly 4 weeks before you intend to mail, even though it takes one weekend in theory.
3. Test one full envelope before assembly-line stuffing
A test envelope confirms weight (which decides postage), fit (some belly bands won’t slide on once the stack is too thick), and seal behavior (some wax seals interact with envelope adhesive). Skipping the test is how couples end up reordering envelopes mid-assembly.
The Complete Wedding Invitation Suite Assembly Order (Step by Step)
Most guides stop at the basics. Premium suites from Paperlust often include five or more pieces, and the layering order actually matters for both presentation and postage weight. Use this sequence every time, regardless of suite size.
Step 1: Lay out all pieces before you start
- Main invitation card
- Details card (also called information card or accommodation card)
- RSVP card
- Pre-stamped RSVP return envelope (addressed back to you)
- Any extras: wishing well card, hotel card, directions card, activity card
- Any wrapping layer: vellum wrap, tissue paper, belly band
- Outer mailing envelope (pre-addressed and sealed last)
Count your pieces before you sit down. Running out of RSVP envelopes at piece 47 of 120 is avoidable.
Step 2: Build the insert stack (largest to smallest)
- Place the main invitation card face-up on your work surface. This is the foundation of every stack.
- Set the details card directly on top of the invitation, face-up, aligned at the top edge.
- If you have a wishing well card, hotel card, or any other secondary inserts, stack them on top of the details card in descending order of size.
- Place the RSVP card on top of all inserts, face-up.
- Slide the RSVP return envelope behind the RSVP card, flap-side down. The envelope goes behind the card, not inside it.
Step 3: Apply any wrapping layers
- If using a vellum wrap, lay it flat on your work surface and set the card stack on top of it. Fold the vellum sides over the stack and crease firmly with a bone folder or your fingernail at the score lines.
- If using a belly band, set the stack on the center of the band, flip the whole unit over, fold the belly band flaps over the back of the stack, and secure with a small piece of invisible tape.
- If applying a wax seal to the vellum wrap, do this now before inserting into the envelope. Apply the seal to the front of the closed wrap. Allow to cool fully, at least 60 seconds, before touching.
Step 4: Insert into the outer envelope
- Hold the envelope address-side down, flap open.
- Slide the stack in face-up (design facing the back of the envelope). When your guest opens the envelope, the main invitation faces them.
- For double envelopes: insert the inner envelope (closed, unsealed) into the outer envelope, inner flap down.
- Seal the outer envelope with a damp sponge, never lick.
- Add any decorative wax seal to the outer envelope flap only after the glue has dried (usually 2-3 minutes).
Step 5: Quality-check before the assembly line
- Weigh the test envelope at home with a kitchen scale. Standard US letter rate covers up to 1 oz (approximately 28g). Most suites with inserts run 1.5 to 2 oz and need additional stamps.
- Check that no inserts shift or fall out when the envelope is turned upside down and gently shaken.
- Confirm the envelope seals flat, thick suites can prevent the flap from closing cleanly.
- Take the test envelope to your post office and request hand-canceling confirmation before mailing the full batch.
Inner and Outer Envelope: How to Use Both (and Which to Skip)
The double-envelope tradition dates from the Victorian era, when outer envelopes were handled by postal workers and arrived battered. The pristine inner envelope was then presented to guests by the household butler or footman. Very few couples today have butlers, but the tradition persists for formal and black-tie weddings. Here’s how to decide whether to use it and, if so, how to assemble correctly.
When to use both envelopes
A double-envelope setup makes sense if your wedding is formal (black-tie, seated dinner, church ceremony), if you want to specify exactly which family members are invited, or if you’re sending to households where addressing only to “The Thompson Family” isn’t specific enough. It also signals to guests that extra care went into the invitation.
When one envelope is enough
For casual, outdoor, or destination weddings, a single high-quality outer envelope is the right call. Focus your budget on addressing quality, calligraphy-style printing or hand-lettering, and a beautiful wax seal or liner instead. Single-envelope suites are also lighter, which often means standard postage.
How to address both envelopes correctly
The outer envelope uses the full formal name and mailing address: “Mr. and Mrs. James Thompson, 1234 Maple Street, Chicago, IL 60601.” The inner envelope uses first names or a less formal version of the same names: “James and Emma” or “The Thompsons.” If children are included, list their first names on the inner envelope only, leaving them off signals they are not invited.
Assembly with double envelopes
- Build your insert stack as normal (invitation at bottom, inserts on top).
- Slide the stack into the inner envelope, face-up, flap left open.
- Do not seal the inner envelope, it should be easy to open.
- Slide the inner envelope into the outer envelope with the inner flap facing down (away from the outer envelope’s flap).
- Seal the outer envelope only.
The inner envelope name faces up so the host or recipient sees the guest names immediately when opening the outer.
Wax Seals on Wedding Invitations: How to Apply Without Cracking
Wax seals are the detail that makes a premium suite feel truly special. They’re also the step where couples most often run into problems: cracked seals, wax that won’t stick, stamps that fog up, or seals that tear the envelope when opened. Here’s how to do it properly.
What you need
- Wax sticks or wax beads: glue-gun sticks are more consistent than traditional sealing wax, especially for large batches
- A wax seal stamp with your monogram or a design that matches your suite
- A heat source: wax melting spoon over a flame (for beads), or a dedicated glue gun with wax sticks
- Silicone release spray or cooking spray: applied lightly to the stamp face to prevent sticking
- Damp cloth: to clean the stamp between uses on a large batch
- A flat, non-porous work surface: silicone mat ideal, marble or glass works too
Step-by-step: applying wax seals to envelopes
- Chill your stamp: place it in the freezer for 10-15 minutes before you start. A cold stamp releases cleaner and reduces fogging from heat transfer.
- Apply release agent: a light spritz of silicone release spray on the stamp face. Don’t over-apply; excess spray can cloud the wax surface.
- Melt the wax: pour wax beads into a melting spoon and heat over a flame until liquid, or melt wax sticks through a dedicated glue gun. The wax should flow easily; thick or lumpy wax means it isn’t hot enough.
- Pour in a circle: hold the spoon or gun about 1-2 cm above the envelope and pour a circle of wax slightly larger than your stamp diameter. Don’t move the envelope after pouring.
- Stamp straight down: press the stamp directly down into the center of the wax pool. Apply firm, even pressure. Do not rotate or rock the stamp, this blurs the impression.
- Hold for 10-15 seconds: the wax needs this time to firm up around the stamp. Too short and the impression won’t hold; too long and the wax cools around the stamp and the seal may crack on removal.
- Release straight up: lift the stamp directly upward. If the wax grips, apply slight side pressure to the envelope (not the seal) to break the suction, then lift cleanly.
- Allow to cool fully: 60 seconds minimum before touching. The seal continues to set after the stamp is removed.
Where to apply the wax seal
- On vellum wraps: Apply to the front of the closed vellum wrap to hold the two flaps together. This is the most visually striking placement, the seal is the first thing your guest sees when they open the outer envelope.
- On outer envelope flaps: Apply over the sealed flap as a decorative element. Wait until the envelope glue has fully dried before adding wax.
- Do not apply to the outer envelope flap on envelopes that will go through automated mail sorting, wax seals on outer envelopes can catch in USPS or Australia Post sorting machinery. Request hand-canceling at the post office if you apply seals to outer envelopes.
Why wax seals crack and how to prevent it
| Problem | Cause | Fix |
|---|---|---|
| Seal cracks after cooling | Wax too hot when poured; cooled too fast | Let wax cool 5 seconds before pouring; work in a room-temperature environment |
| Stamp impression fogged or blurry | Stamp too warm; not enough release agent | Chill stamp between batches; re-apply release spray every 5-6 seals |
| Wax sticks to stamp | Stamp removed too early; insufficient release agent | Hold stamp 15 seconds; apply more release spray before each seal |
| Seal won’t stick to vellum | Vellum surface is too smooth for standard wax | Use glue-gun wax sticks (not traditional sealing wax); slightly rough the vellum surface with a fine-grit nail file where the seal will land |
| Seal cracks in transit | Applied to outer envelope and passed through sorting machinery | Request hand-canceling at the post office; or apply seals to inner vellum wraps only |
Vellum Wraps, Ribbon Bands, and Belly Bands: How to Assemble
These three elements serve different purposes and require different assembly techniques. Understanding the difference saves you from one of the most common assembly-day errors: applying them in the wrong order or using the wrong adhesive.
Vellum wraps
A vellum wrap is a translucent sheet folded around the invitation card (or the full suite) that adds a softening overlay effect. It’s one of the most popular upgrades for premium suites because it adds visual layering without adding significant weight or bulk.
How to fold and apply a vellum wrap:
- Lay the vellum sheet face-down on a clean, flat surface. If your vellum came pre-scored, identify the fold lines before you start.
- Place your card stack (invitation + inserts) face-up, centered on the vellum sheet.
- Fold the left side of the vellum over the stack first, aligning the edge with the right side of the invitation.
- Fold the right side of the vellum over the left, creating a neat jacket. Use a bone folder or your fingernail to sharpen the fold lines.
- Secure the wrap: wax seal applied to the front of the closed wrap is the cleanest option for formal suites. Ribbon tied horizontally around the wrap works well for boho or garden-style suites. Belly band slid over the entire wrapped unit keeps the look minimal and modern.
- Insert the wrapped unit into the envelope left-side down to prevent the vellum from snagging on the envelope opening.
Pro tip: A bone folder makes the difference between a clean vellum fold and a creased mess. If you don’t have one, the edge of a butter knife works as a reasonable substitute for small batches.
Ribbon bands
Ribbon is applied around the outside of the assembled suite (before envelope insertion) or around the outside of a vellum wrap. Satin, velvet, and grosgrain ribbons all work well. The key is a consistent bow or knot size across all suites.
How to apply ribbon consistently:
- Cut all ribbon pieces to the same length before you begin. For a standard A5 invitation, cut ribbon to approximately 50-55 cm (about 20-22 inches) for a small bow, or 65-70 cm (about 26-28 inches) for a larger bow with long tails.
- Wrap the ribbon around the stack horizontally, positioning it at roughly the top third of the suite for a classic look (or centered for a modern look).
- Tie a square knot (not a bow knot, which comes loose in transit). For a neat bow, tie the square knot first, then form the loops.
- Trim the tails at a 45-degree angle to prevent fraying.
- Insert into the envelope ribbon-side up so the bow is visible when the recipient opens the envelope.
Belly bands
Belly bands are pre-scored paper strips, typically 50mm wide, that wrap around the invitation stack at the waist. Unlike ribbon, belly bands are structural, they hold the stack together firmly enough that some couples use them instead of an inner envelope. Paperlust belly bands are printed to match your suite and arrive pre-scored for easy wrapping.
How to apply a belly band in three steps:
- Stack and center: Place your completed insert stack face-up at the center of the belly band (belly band face-down on the table). Align the band so it sits at the horizontal center of the suite, not at the top or bottom edge.
- Wrap and secure: Fold the scored belly band flaps around the back of the stack. The two flaps should overlap at the back center. Secure with a small piece of clear tape or a glue dot. Do not use sticky tape on the front face of the band, it shows.
- Insert into envelope: Slide the banded suite into the envelope with the personalized face of the belly band facing up. The personalization should face the back of the envelope so it’s visible when the envelope opens.
Combining elements: For the most polished look, apply the vellum wrap first, then secure with a wax seal, then slide the entire vellum-wrapped unit into the outer envelope. If using both vellum and a belly band, apply the belly band over the vellum wrap before inserting into the envelope.
Wedding Invitation Assembly FAQs
What order do wedding invitation inserts go in?
Stack from largest to smallest: main invitation at the bottom (face-up), then details card, then any secondary inserts (hotel card, directions, etc.), then the RSVP card on top. The RSVP return envelope tucks behind the RSVP card, flap-side down. The entire stack goes into the outer envelope face-up so the text faces the recipient when opened.
Do I need inner and outer envelopes for wedding invitations?
No. The double-envelope tradition is optional and comes from the Victorian era. Most modern couples use a single high-quality outer envelope and focus budget on addressing quality and wax seals instead. Double envelopes are most appropriate for formal black-tie weddings where specifying individual guests by name matters.
How do I apply a wax seal without it cracking?
Chill your stamp in the freezer for 10-15 minutes before use, apply a light release agent to the stamp face, pour the wax in a circle (not a blob), press the stamp down with firm even pressure, hold for 10-15 seconds, and lift straight up. Allow 60 full seconds to cool before touching. Using glue-gun wax sticks rather than traditional sealing wax gives more consistent results on large batches.
Can I put a wax seal on the outer mailing envelope?
You can, but request hand-canceling at the post office when you drop them off. Wax seals on outer envelopes can catch in USPS or Australia Post automated sorting machinery and damage or tear the envelope. Most post offices will hand-cancel a batch for free or for a small fee. Alternatively, apply your wax seal to the inner vellum wrap instead and leave the outer envelope plain.
How do I fold a vellum wrap for wedding invitations?
Lay the vellum face-down on a flat surface. Place the invitation stack face-up, centered. Fold the left vellum flap over the stack first, then fold the right flap over the left. Use a bone folder to sharpen the crease lines. Secure with a wax seal to the front of the closed wrap or with a ribbon tied horizontally. Insert into the envelope left-side-down to prevent snagging.
What’s the difference between a belly band and a ribbon on wedding invitations?
A belly band is a structured pre-scored paper strip (usually printed to match your suite) that wraps and secures your invitation stack firmly, it holds pieces together without any knot or bow. A ribbon is purely decorative and is tied around the stack or vellum wrap in a bow. Belly bands are better for assembly-line stuffing because they’re faster and more consistent. Ribbons are better for suites where the open look of a bow is part of the visual design.
When should wedding invitations be mailed?
Mail formal wedding invitations 6 to 8 weeks before the wedding date. For destination weddings or weddings on holiday weekends, mail 3 to 4 months in advance. Always send save the dates 4 to 8 months before, and 6 to 12 months before for destination or peak-season dates.
How do I stuff wedding invitations efficiently?
Set up an assembly line with separate piles for each component before you start. Address and seal all envelopes first (or have them pre-addressed), then assemble suites in one sitting. Work through all suites in one component at a time rather than completing each suite individually, it’s dramatically faster. Allow a full evening for 100+ invitations.
How much does it cost to mail a stuffed wedding invitation?
In the US, a single-card invitation in a standard A7 envelope runs around $0.68 (one Forever Stamp). A full suite with insert cards typically weighs 1.5 to 2 oz, requiring an additional stamp ($0.24-$0.28 extra). Wax seals, vellum wraps, and rigid inserts can push weight higher. Always weigh one test suite before buying stamps for the full batch.
Can I seal envelopes without licking them?
Yes, and you should. Run a damp sponge or a small flat brush dipped in water along the envelope adhesive strip. This activates the glue cleanly without the taste and without the risk of paper cuts or ingesting envelope adhesive. Allow 2-3 minutes to dry before stacking sealed envelopes, or they may stick together.
Ready to order your invitation suite?
Browse 500+ designs from independent artists. All suites arrive with matching envelopes, and add-ons like belly bands, liners, and RSVP cards ship together.
Nice advice. thank you
¿Cómo adaptarías la celebración de un cumpleaños durante la pandemia para que sea memorable y especial, a pesar de las restricciones de distanciamiento social y la limitación de reuniones?