
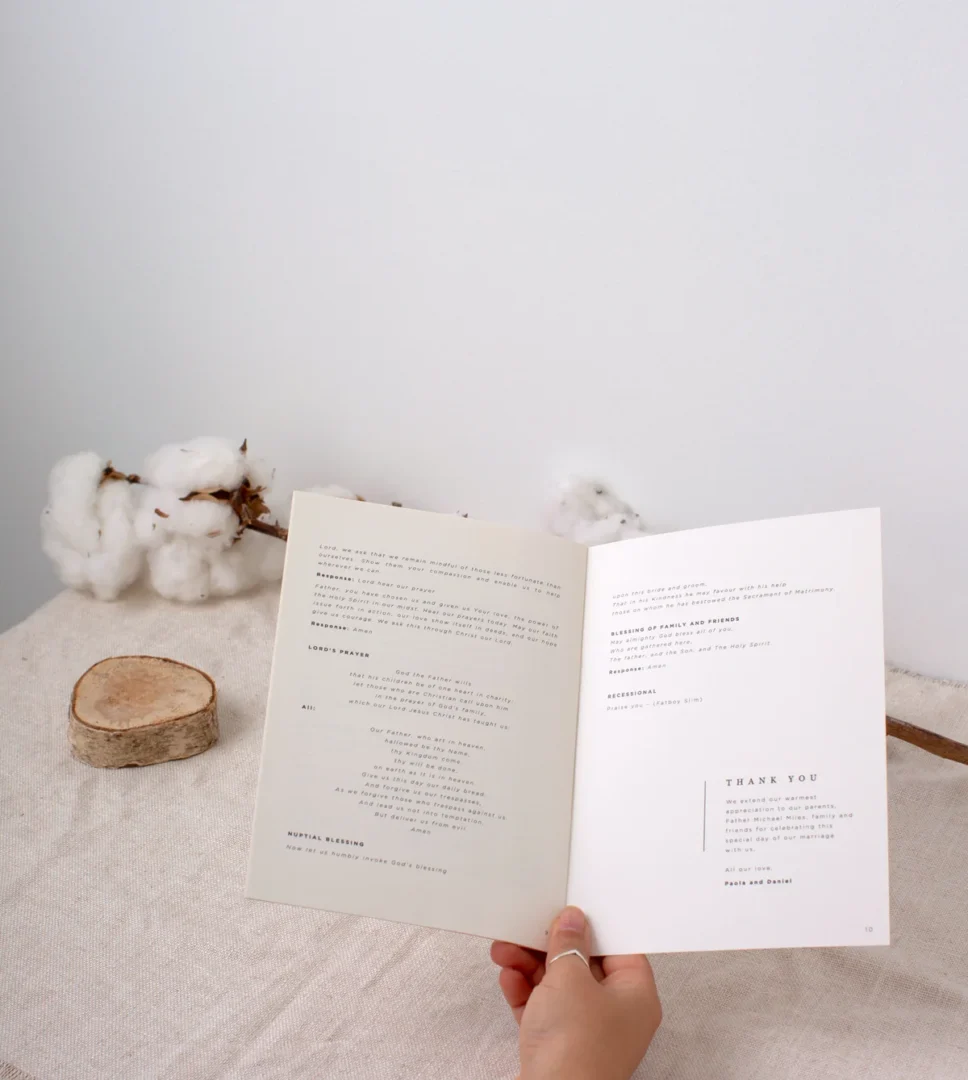
What to include:
- Cover: couple names, wedding date, venue name, city
- Order of ceremony (processional through recessional)
- Wedding party roles and names
- Readings, music selections, and performers
- Optional: welcome note, in memoriam, unplugged ceremony notice
Format options compared:
| Format | Best For | Page Count |
|---|---|---|
| Single page | Short civil ceremony | 1 |
| Bi-fold | Most ceremony lengths | 4 panels |
| Tri-fold | Long ceremonies, lots of detail | 6 panels |
| Booklet | Religious/full-day programs | 8+ pages |
Timing: Finalize wording 6-8 weeks out. Order printed programs 4-6 weeks before the wedding. Proofs delivered in 1-2 business days.
Your wedding ceremony program does more than list names. It gives guests a map for one of the most meaningful hours of your life, introduces the people who matter most to you both, and doubles as a keepsake that sits in a drawer or a frame for years to come. This guide covers every aspect of creating yours: what to include, how to word it, which format fits your ceremony, and how to order beautifully printed programs through Paperlust. For context on how your programs fit into the full stationery picture, see our wedding stationery suite guide.
What Is a Wedding Program and Why Do Couples Use One?
A wedding ceremony program is a printed guide that walks guests through the events of your ceremony from start to finish. It typically lists the order of the proceedings, names of the wedding party, any readings or musical selections, and practical notes for guests who may not be familiar with your ceremony traditions.
Programs serve several purposes at once. They help guests follow along during an unfamiliar ceremony, such as a religious service with responses or a cultural tradition guests may not have experienced. They acknowledge the people in the wedding party in a tangible, lasting way. And they give guests something to hold during the ceremony, which turns out to be more useful than it sounds.
Not every wedding needs a formal printed program. A short civil ceremony with close family and friends may not need one. But for any ceremony longer than about 20 minutes, or for any ceremony with religious, cultural, or multilingual elements, a program almost always improves the guest experience.
The physical object itself also has enduring value. Unlike digital programs sent via QR code (which we discuss later), a printed program survives the wedding day. Guests take them home. They appear in wedding albums. Some couples frame them alongside invitations and table numbers as part of a display.
What to Include in a Wedding Ceremony Program
The Cover
- Both partner names (first names only, or full names depending on style)
- Wedding date
- Venue name and city
- Optional: a short line like “Please silence your phones” or a welcome sentiment
The Order of Ceremony
This is the core of your program. List each element in sequence so guests know what to expect.
- Prelude music (optional, if guests are seated to live music)
- Processional
- Welcome or opening words from the officiant
- Readings (list title, author, and reader’s name)
- Exchange of vows
- Ring exchange
- Pronouncement
- Recessional
For a religious ceremony, add ceremony-specific elements: a responsorial psalm, the Liturgy of the Word, a unity candle lighting, or other ritual elements your tradition includes.
Wedding Party
- Officiant name and role
- Maid of honor / best person
- Bridesmaids and groomsmen (list with roles)
- Flower girls, ring bearers, ushers
- Parents of the couple (optional but appreciated)
Music
- Song titles and composers or artists
- Performer names (soloist, string quartet, organist)
- Which part of the ceremony each song accompanies
Optional Sections
- Welcome message from the couple
- In memoriam acknowledgement for loved ones who have passed
- Unplugged ceremony request (“We invite you to be fully present…”)
- Guest participation prompts (for responsive readings)
- A note of thanks
- Reception details
You can also see a broader range of inspiration in our existing wedding program examples collection.
Wedding Program Wording Conventions
Tone
Match your program’s tone to your invitation. If your invitation reads “request the honour of your presence,” your program should follow the same register. If it reads “join us as we celebrate,” a warmer, more casual tone suits the program.
How to List Names
- Traditional formal: “Miss Jane Elizabeth Collins, Maid of Honor”
- Contemporary formal: “Jane Collins, Maid of Honor”
- Casual: “Jane, my best friend and maid of honor”
For parents: list all sets of parents including step-parents if they played an active role. The most common wording is “parents of the bride / parents of the groom” though many couples personalize this.
Same-Sex Ceremony Language
- Replace “bride and groom” with partner names or “the couple”
- Replace “maid of honor / best man” with “honor attendant / person of honor” or the specific role each person chose
- Use “processional” without qualifying which partner walks when, if you prefer
In Memoriam
Keep it brief and warm. A common format: “We remember with love [Name], whose spirit is with us today.” Or list names under a simple header like “In Loving Memory.”
Unplugged Ceremony Notice
- Formal version: “We kindly ask that you refrain from using mobile devices during the ceremony.”
- Friendly version: “We have a professional photographer capturing every moment. Please be fully present with us.”
For a complete set of wording examples across every ceremony section, see our detailed wedding program wording guide with 30+ copy-ready examples.
Program Formats: Single Page, Bi-Fold, Tri-Fold, and Booklet
The right format depends on how much content you have, your ceremony type, and the look you want guests to hold.
Single Page (One Sheet)
- Best for: Short ceremonies, small guest lists, or couples who prefer minimal detail
- Fits: Couple names, date, basic order of service, key wedding party names
- Limitation: No room for readings text or extensive party lists
Bi-Fold (Four Panels)
- Best for: Most ceremonies – the most commonly ordered format
- Layout: Cover + 2 interior panels + back panel
- Fits: Full order of ceremony, complete wedding party, 1-2 readings, music list, optional in memoriam
- Benefit: Opens flat and is easy to hold and read during the ceremony
Tri-Fold (Six Panels)
- Best for: Longer ceremonies or ceremonies with many elements to detail
- Fits: Everything a bi-fold holds, plus space for full reading text, extended welcome note, or program in two languages
- Note: Can feel slightly bulkier to hold; works well at seated ceremonies with armrests or pew seating
Booklet (8+ Pages)
- Best for: Religious ceremonies (Catholic Mass, full Anglican service, Jewish ceremony) or full-day programs
- Fits: Full liturgy, response prompts for guests, complete hymn lyrics, detailed acknowledgements
- Look: Most keepsake-worthy format; sits flat like a small magazine
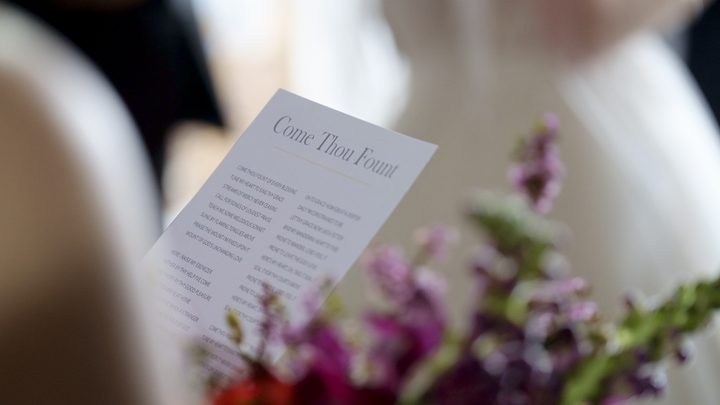

Content Hierarchy: What Goes Where in the Layout
Before you touch a design tool, map out every piece of content the program needs to contain. Before you build layouts, make sure your wording is right, see Wedding Program Wording Examples for templates you can adapt. Then arrange content in reading priority order.
Inside panels (bi-fold or booklet)
The inside left panel typically opens with the wedding party (officiant, bridal party, parents) in the order they appear. The inside right panel, the panel a guest sees first when they open the program, carries the ceremony order itself. This is the highest-priority reading surface, so it should be the most legible, with generous line spacing and clear section labels.
Back cover or final panel
Use this space for acknowledgments, a memorial note for loved ones who have passed, music credits, or a short thank-you message to guests. Some couples also add a QR code linking to a song playlist or website for further details. For real design examples by ceremony style, see Wedding Program Examples.
Column layouts
Programs often use two-column layouts for the ceremony order, particularly when you need to show two languages side by side or fit a longer list of readings. If you use columns, keep them narrow enough that a single line of text does not exceed 65-70 characters, wider lines slow reading speed. A column gutter of at least 0.25 in (6 mm) prevents text from visually running together.
Wedding Program Design Basics: Layout, Font, and Readability
Programs are read in dim ceremony venues, outdoors in varying light, and by guests of all ages. Good design isn’t just about looking beautiful – it’s about being readable under those conditions.
Font Choices
- Body text: Keep it 9-11pt minimum. Elegant serif fonts (like Playfair Display or Cormorant Garamond) read well at this size on premium paper. Avoid highly stylized script for body text – it looks beautiful on the cover but becomes unreadable in small sizes.
- Headings: Script or decorative fonts work well for section headers and the couple’s names. Use them sparingly to maintain hierarchy.
- Contrast: High-contrast combinations – black or dark navy on white or cream – are the most readable. Light grey on white fails under low-light conditions.
The two-font rule
Use two fonts: one for display (headings, couple’s names, section labels) and one for body text (ceremony order, reading credits, acknowledgments). Adding a third font almost always creates visual noise. If you need variety, vary the weight and size of your two chosen fonts instead.
Layout Principles
- Keep margins generous – at least 12mm on all sides for printed programs
- Use clear visual hierarchy: couple names largest, section headers medium, body text smallest
- Left-align body text for longest-line readability; centered layouts work beautifully for short decorative sections
- Leave white space between sections rather than cramming content edge to edge
Limit your palette
Programs work best with two or three colors: a dominant neutral (cream, white, black, warm tan), a single accent color drawn from your wedding palette, and optionally a metallic (gold, copper, silver) used sparingly for section rules or the couple’s names. More than three colors fragments the design and makes the program feel cluttered.
Avoid busy backgrounds
Full-bleed floral or pattern backgrounds behind body text create readability problems in any lighting condition other than bright midday sun. If you want a decorative background element, constrain it to the cover or to a single cover panel, and keep it light enough that black text on top remains at high contrast.
Print Method Choices for Programs
- Digital print: Most affordable and fastest. Full color capability. Works across all paper stocks. The right choice if you have photos, a colorful design, or a tight timeline.
- Flat foil: Adds a mirror-bright metallic accent on cover text, monograms, or decorative borders. No custom die or debossing – flat and elegant. Available in gold, rose gold, silver, copper, and more.
- Letterpress: Pressed into thick cotton paper (300gsm Wild Cotton) for a tactile, heritage feel. Best for minimalist designs with strong typographic layouts. Works beautifully for formal and classic ceremonies.
- Metallic print: A fifth imaging station applies metallic pigment to specific design elements. Subtler than flat foil, and more affordable – a good middle ground for couples who want a hint of gold without the full foil cost.
Paper and Print Finish Options for Wedding Programs
Paper choice shapes the tactile experience of the program before a guest reads a single word. The right stock also affects how well fonts render and how vivid any design elements appear.
Paper weight
Programs are handled throughout the ceremony, so paper weight matters for durability. A 300 gsm (approximately 110 lb cover) stock holds its shape without flopping. Thinner stocks (below 200 gsm) curl and feel insubstantial in the hand. For booklets, the cover can go heavier (350-380 gsm) while the interior pages run lighter (120-160 gsm text weight).
Matte vs. coated finishes
Matte stock is the most practical choice for programs. It absorbs light rather than reflecting it, which means text stays readable in bright outdoor settings, candlelit chapel light, or midday sun. Coated or glossy stock reflects ambient light, which can wash out fine serif fonts and create glare when guests try to follow along during the ceremony.
Matching Your Program to Your Invitation Suite
Couples often design the invitation months before the program. By the time the program is due, it is easy to drift away from the original design language. A unified stationery suite is a detail guests notice and photograph, even if they cannot articulate why.
The two-element rule for matching
You do not need the program to be a miniature invitation. You need it to feel like it belongs to the same family. The simplest way to do that is to carry forward two elements from the invitation: one font (typically the display font from the invitation cover) and one color (usually the accent color or any foil treatment color).
Using Paperlust’s design library
If you used a Paperlust design for your invitations, you can return to the same design family for your programs and find coordinating templates that already share the font, motif, and color language. That is the fastest path to a cohesive suite. Browse coordinating designs at Paperlust wedding programs.
Setting Up Your Design File for Print (Bleed, Resolution)
If you are designing your own program or supplying an edited template to a printer, getting the technical setup right prevents delays and unexpected reprints. These are the print-ready specifications that apply across professional print providers.
Bleed
Bleed is the area of your design that extends beyond the finished edge of the printed piece. It exists so that when the printer trims to the final size, any background color or pattern that runs to the edge does not leave a thin white border from minor trimming variation. The standard bleed is 0.125 in (3 mm) on each side. If your finished program is 5.5 x 8.5 in (140 x 216 mm), your design file should be 5.75 x 8.75 in (146 x 222 mm) including bleed.
Safe zone
Keep all critical text and design elements at least 0.125 in (3 mm) inside the trim edge, the “safe zone.” Text placed right at the trim edge can get cut in trimming. The safe zone and the bleed are on opposite sides of the trim line: bleed extends out, safe zone pulls in.
Image resolution
Any photo or raster image embedded in your design file needs to be at least 300 dpi at final print size. An image that looks sharp on screen at 72-96 dpi will look soft or pixelated when printed. If you are including a photo of the couple on the cover, source the original camera file rather than a screen-optimized version downloaded from social media.
Color mode
Design in CMYK, not RGB. RGB is the color model for screens; CMYK is the model used in printing. Colors you see on screen in RGB (especially vibrant blues, purples, and reds) can shift significantly when converted to CMYK at the printing stage. Set your document to CMYK from the start to avoid surprises.
Fold lines for bi-folds and tri-folds
If you are supplying a bi-fold or tri-fold as a single flat design file, mark the fold lines as guides (not as printed lines) so the printer knows where the folds will fall. The outside of a folded sheet and the inside will be on the same flat artwork file but on opposite sides of the fold guide.
Professional vs DIY: When to Design Your Own Program
Designing your own program is a realistic option for couples who are comfortable with design tools. The key question is not whether you can do it, but whether the time investment is worth it given your other wedding planning priorities.
When DIY works well
- You have access to a design tool (Adobe InDesign, Canva Pro, or Affinity Publisher) and are comfortable with it.
- Your program is a simple format: a single-page fan or a bi-fold with clean, minimal design.
- You want full control over every word and layout change right up to the final proof.
- You are ordering from a printer that provides clear file templates with bleed and safe-zone guides already set up.
When to use a professional template or custom design
- Your ceremony is long or complex (religious service with full liturgy, bilingual ceremony, multiple officiants).
- Your invitation suite used a specific print method (letterpress, flat foil) and you want the program to match exactly.
- You are not confident setting up bleed and safe zones in a design application.
- You are ordering at higher quantities (100+ programs) where a mistake is costly to reprint.
How Many Wedding Programs to Order
The standard approach is one program per couple or household, not one per guest. For a 100-person wedding, this means approximately 60-70 programs. Then add buffer:
Calculating Your Quantity
- Count confirmed guest households (couples count as one)
- Add 15% buffer for last-minute additions and vendor copies
- Add a small number for keepsakes: immediate family members often want their own copy, and the couple typically keeps two or three
| Guest Count | Est. Households | Recommended Order Qty |
|---|---|---|
| 50 guests | ~35 | 40-45 |
| 100 guests | ~65 | 75-80 |
| 150 guests | ~95 | 110-120 |
| 200 guests | ~130 | 150-160 |
One note: if your ceremony includes elements where all guests need to follow along (responsive readings, a shared prayer, printed hymn lyrics), order one per person rather than one per household.
When to Finalize and Print Your Wedding Programs
Programs are often the last stationery item to be finalized because they depend on information that changes late in the planning process – a reading choice, a wedding party update, a music selection. Here is a realistic timeline:
8 Weeks Before the Wedding
- Decide on format (bi-fold, booklet, etc.) and design direction
- Start browsing templates on Paperlust and shortlist your favorites
- Order a sample pack to feel the paper stocks in person
6 Weeks Before
- Lock in your ceremony order of service with your officiant
- Confirm all wedding party roles and spelling of every name
- Finalize readings, readers, and musicians
4-5 Weeks Before
- Place your order on Paperlust
- A professional designer will have your proof ready within 1-2 business days
- Review proof carefully: check every spelling, every name, every role title
- Two rounds of edits are included at no extra cost
3 Weeks Before
- Approve the final proof
- Production and shipping begins
- US orders ship via DHL Express (orders over $350 USD ship free)
Avoid the Rush
Most programs-related stress comes from leaving wording decisions too late. The design takes a day to proof; the wording decisions take weeks. Separate those two tracks and you will have programs in hand well before the rehearsal.
Digital vs Printed Programs: A Practical Comparison
QR-code digital programs became popular during the pandemic and remain a practical option in some contexts. Here is an honest comparison:
| Printed Programs | Digital / QR Programs | |
|---|---|---|
| Accessibility | No device required | Requires smartphone and data |
| Keepsake value | High – physical object guests keep | Low – typically forgotten after the day |
| Ceremony experience | No screens in guests’ hands | Glowing screens visible during ceremony |
| Last-minute edits | Not possible once printed | Editable up to ceremony day |
| Outdoor/low-signal venues | Works anywhere | May fail without signal |
| Cost | Per-unit print cost | Low (hosting + QR code) |
| Design quality | Physical print texture and finish | Screen only |
The majority of couples planning weddings in 2026 still choose printed programs, particularly for ceremonies with guests across multiple generations. A common middle-ground approach: print programs for all guests, and have a QR code available on signage or at the ceremony entrance as a backup.
For a detailed look at ceremony-specific program structures, see our guide to the Order of Service for a Wedding: A Complete Ceremony Guide.
Wedding Program FAQs
Do you need a program for your wedding?
What is the difference between a wedding program and an order of service?
How many programs should you order for a wedding?
When should you order wedding programs?
What size should wedding programs be?
What print methods are available for wedding programs?
Can you print wedding programs in Australia and ship to the US?
Can you use a QR code for a wedding program instead of printing?
What is the best paper for wedding programs?
How far in advance should you finalize the wording?
Should a wedding program be matte or glossy?
Do wedding programs need bleed?
Can I match my wedding program to my invitation design?
Ready to Design Your Wedding Programs?
Browse exclusive designs. Proofs in 1-2 business days. Ships worldwide via DHL Express.